Adding a new user to WordPress is really simple, and in this article we’ll show you how to create a user step-by-step.
How to add a new user to WordPress?
1. Login to your WordPress admin page. If you are unsure of your password, you can click “Lost Password” to reset it. Here are more detailed instructions for resetting your WordPress password.
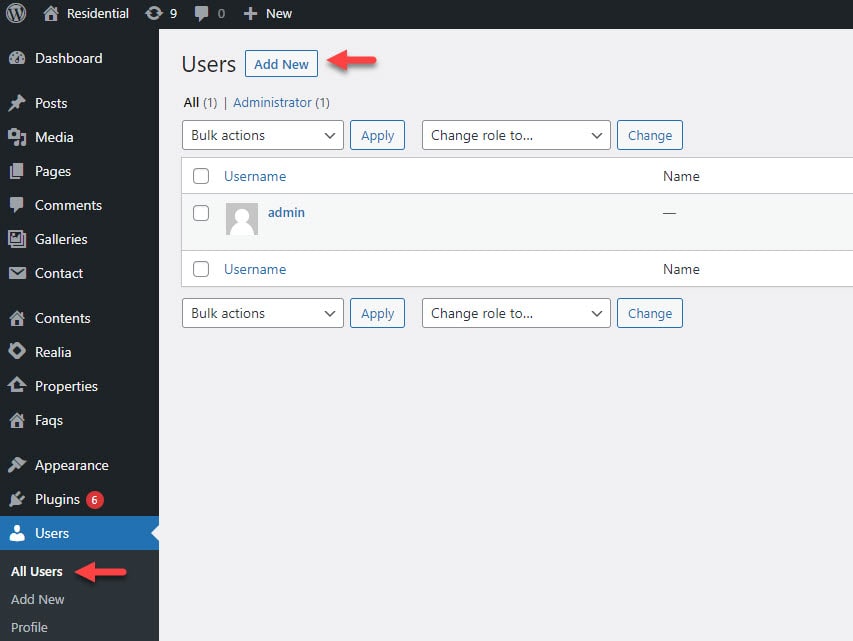
2. When you log in, you have access to the WordPress dashboard. Click Users in the left sidebar.
3. Click Add New at the top of the page.

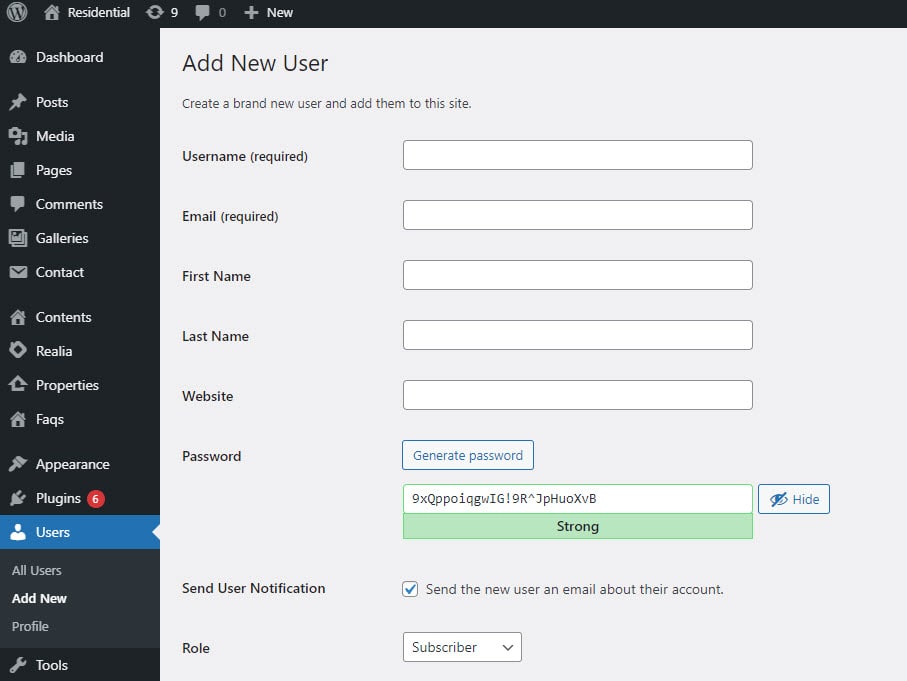
4. You should now be on the Add New User screen. Enter a username and email address for your new user. Name, surname and website are optional.

5. Enter a SECURE password for your new user. WordPress can generate a random password or you can set one yourself. However, using a secure password is important because hackers try to use your login information to compromise your website. Please choose a password with uppercase, lowercase, numbers and symbols.
6. Keep the Send User Notification checked if you would like the new user to receive an email with their login information.
7. You should select a Role for your new user. The Admin role is the default and gives the user access to all the features of the website. If you need to limit your new user’s permissions, see other roles below.
Administrator: somebody who has access to all the administration features within a single site.
Editor: somebody who can publish and manage posts including the posts of other users.
Author: somebody who can publish and manage their own posts.
Contributor: somebody who can write and manage their own posts but cannot publish them.
Subscriber: somebody who can only manage their profile.
8. Click the Add New User button and now the new user can login to WordPress.


